Migrating your Visual Studio license management to AD groups
If you are in an enterprise context where you work with .net development teams, the chances are real that they use a "Visual studio license" and that this license is managed in what is called an "Enterprise Agreement". This agreement allows organizations to buy "Visual Studio Licenses" from Microsoft. Subsequently, these license can then be assigned to the individual users in the development teams, based on their roles.
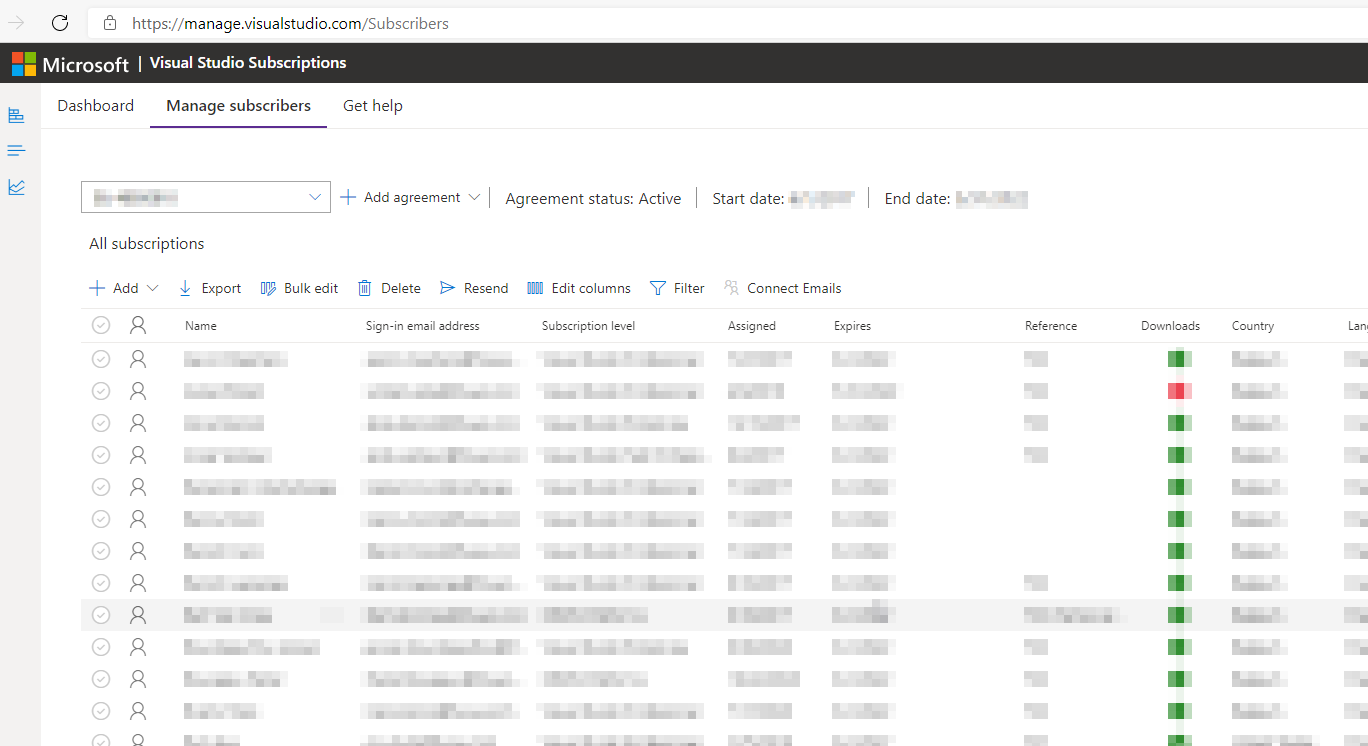
This "license management" can be done (if you have the correct permissions) on the the following visual studio management portal: https://manage.visualstudio.com On the "Manage subscribers" tab, you can select your enterprise agreement (if you have multiple) and then you get an overview of the subscribers, with their assigned licenses:
What?
I have been managing these licenses for a few years now and it was always really practical to be able to assign and/or reassign licenses when needed.
One thing has always been bothering me: I was that I was the only one with access in our team, which meant that:
- there is no (real-time) transparency on the assigned licenses (except when you do an export)
- a consequence of my absence was always that licenses could not be assigned when needed... until I got back.
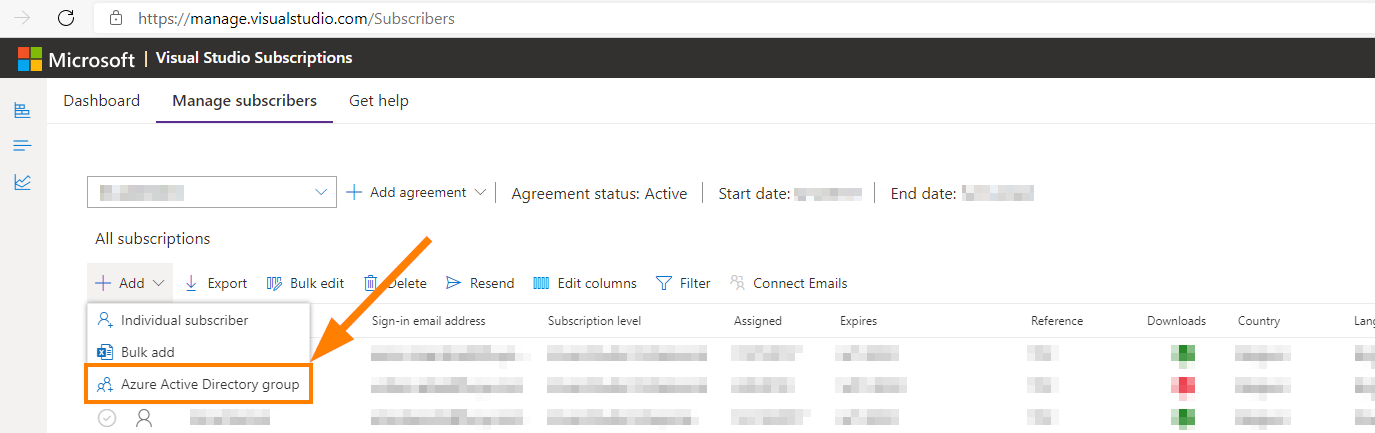
The reason that I'm writing about this, means of course that there is a solution... In the beginning, you really had to log in into the management portal and follow the procedure that I described above. But the interesting thing is that Microsoft added the possibility to assign licenses to Azure Active Directory Groups or even local AD groups, which are synced to Azure AD:
These groups can be managed from outside of the management portal and also provide the means to be more transparent about who has which license assigned. (This "new" feature was added already a long time ago, but I never got to investigating it... until now!)
Below, I'll go deeper into how you can implement this and what you need to look at. I'll also provide you with a script that allows you to import an extract from the management portal into the (local) AD groups:
How
First step: create AD groups
Let's suppose that we are going to assign VS licenses for Enterprise, Professional, TestProfessional and Platforms, then you would need to create AD groups for this. A possible format might be the following:
<AD-GroupNamePrefix>-VISUALSTUDIO-ENTERPRISE<AD-GroupNamePrefix>-VISUALSTUDIO-PROFESSIONAL<AD-GroupNamePrefix>-VISUALSTUDIO-TESTPROFESSIONAL<AD-GroupNamePrefix>-VISUALSTUDIO-PLATFORMS
Tip: Working with the same prefix for these groups will mage your "Management experience" easier if you have a big amount of groups to manage.
In this post, you'll need to replace the <AD-GroupNamePrefix> value with whatever you have defined in your organization.
Second step: Create export
you can choose to manually add each user to the newly created AD groups, but that might be a tedious and time consuming job, certainly if the amount of managed licenses is big...
So what you can also do, is to export the "current" list to an excel file and convert it to a CSV file, which in turn can be easily imported into (and processed by) PowerShell.
Creating this export can be done easily from the management portal (check the "export" button in the previous screenshot)
Third step: Import the users from the csv into the AD groups
I decided to write down the entire script below. You can read it based on the comments that I have added here and there:
 1# Ensure you can work with Active Directory
 2Import-Module ActiveDirectory
 3
 4# Set up some basic variable
 5$groupPrefix= "<AD-GroupNamePrefix>-VISUALSTUDIO-"
 6
 7# Import the exported list
 8$usertable = Import-Csv exportedlist.csv
 9
10# Load the AD groups that were created earlier into your PowerShell context:
11try {
12    $name = $groupPrefix+"ENTERPRISE"
13    $GroupEnterpr = Get-ADGroup -identity $name -EA stop
14}
15catch {
16    Write-Warning "Group not found in Active Directory"
17    return
18}
19try {
20    $name = $groupPrefix+"PROFESSIONAL"
21    $GroupProfessional = Get-ADGroup -identity $name -EA stop
22}
23catch {
24    Write-Warning "Group not found in Active Directory"
25    return
26}
27try {
28    $name = $groupPrefix+"TESTPROFESSIONAL"
29    $GroupTestProfessional = Get-ADGroup -identity $name -EA stop
30}
31catch {
32    Write-Warning "Group not found in Active Directory"
33    return
34}
35try {
36    $name = $groupPrefix+"PLATFORMS"
37    $GroupPlatforms = Get-ADGroup -identity $name -EA stop
38}
39catch {
40    Write-Warning "Group not found in Active Directory"
41    return
42}
43
44# Start processing the imported table (be aware that there can be empty entries)
45foreach ($entry in $usertable.Where{$_.Email -ne ''} ){
46
47    $entry.Email + " -> " + $entry.'Subscription Level'
48    $mail = $entry.Email
49    # retrieve the AD user based on the email adress:
50    $aduser = Get-ADUser -Filter {Emailaddress -eq $mail }
51    # Decide which subscription AD groups this user needs to be added to:
52    if ($entry.'Subscription Level' -like 'Visual Studio Enterprise')
53    {
54        $currentgroup = $GroupEnterpr
55    }
56    if ($entry.'Subscription Level' -like 'Visual Studio Professional')
57    {
58        $currentgroup = $GroupProfessional
59    }
60    if ($entry.'Subscription Level' -like 'Visual Studio Test Professional')
61    {
62        $currentgroup = $GroupTestProfessional
63    }
64    if ($entry.'Subscription Level' -like 'MSDN Platforms')
65    {
66        $currentgroup = $GroupPlatforms
67    }
68    # At this point, you should know which AD group the user needs to be added to:
69    $currentgroup.Name
70    # Add the user to the AD group:
71    #Add-ADGroupMember -Identity $currentgroup -Members $entry
72}
Step four: applying the change in the management portal
Then all you need to do is to "Add your newly (and preferably populated) created AD Groups". The benefit of adding already populated groups, is that the portal will do a validation/cleanup during the process and it will remove all the "directly assigned licenses". This means that if you were able to add all users to the correct AD group (which relates to a Visual Studio License), then your result should be a portal that "only has AD groups in the reference list". If there are however (as in my case) users that were not added to an ad-group, then you need to investigate (and find a solution for this).
In my case, the following issues happened:
- People that left the company, but to which the license was still assigned
- Typo's in the name/email (this was possible in an early version of the portal where there was AD validation)
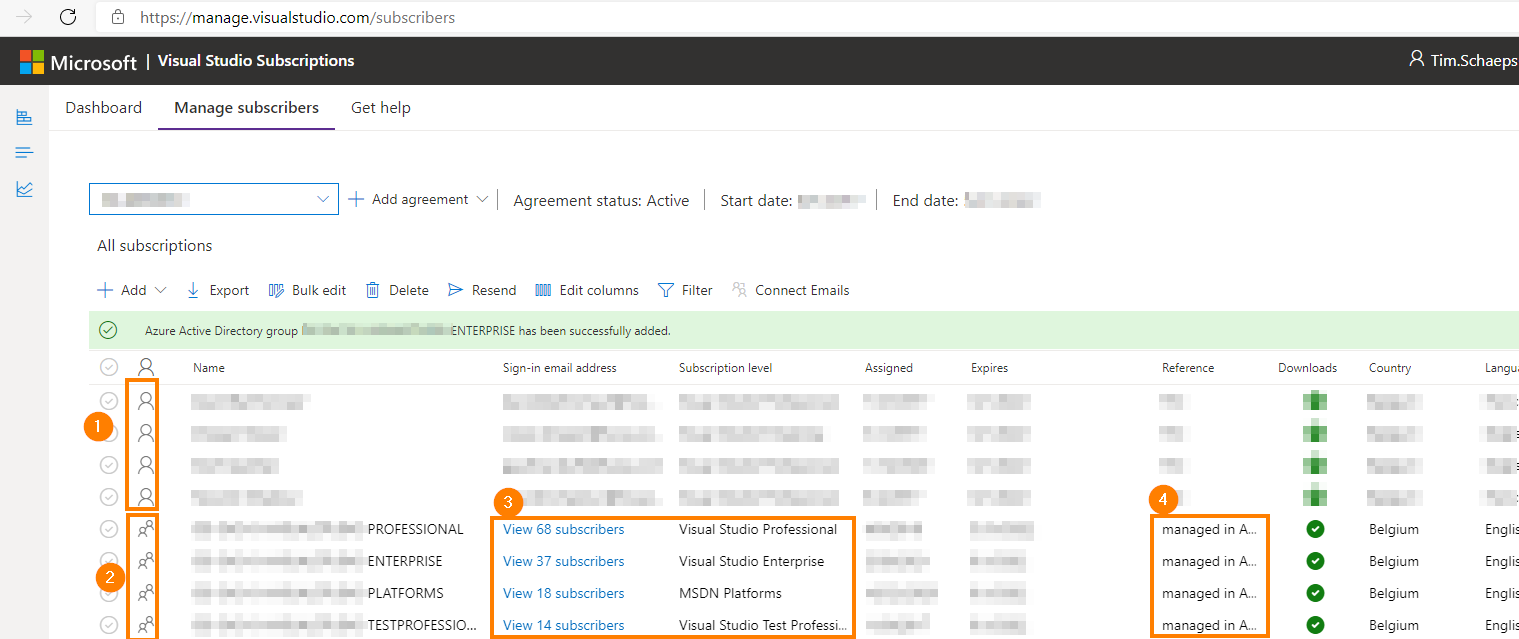
The result was that I had 4 users that were still in the portal. (as you can see next to the (1) in the image below) Next to that (and that was the goal), all the other users are now replaced by 4 AD groups (which each correlate to a Visual Studio License). This can be seen in the (2), ((3) and (4) in the image below)
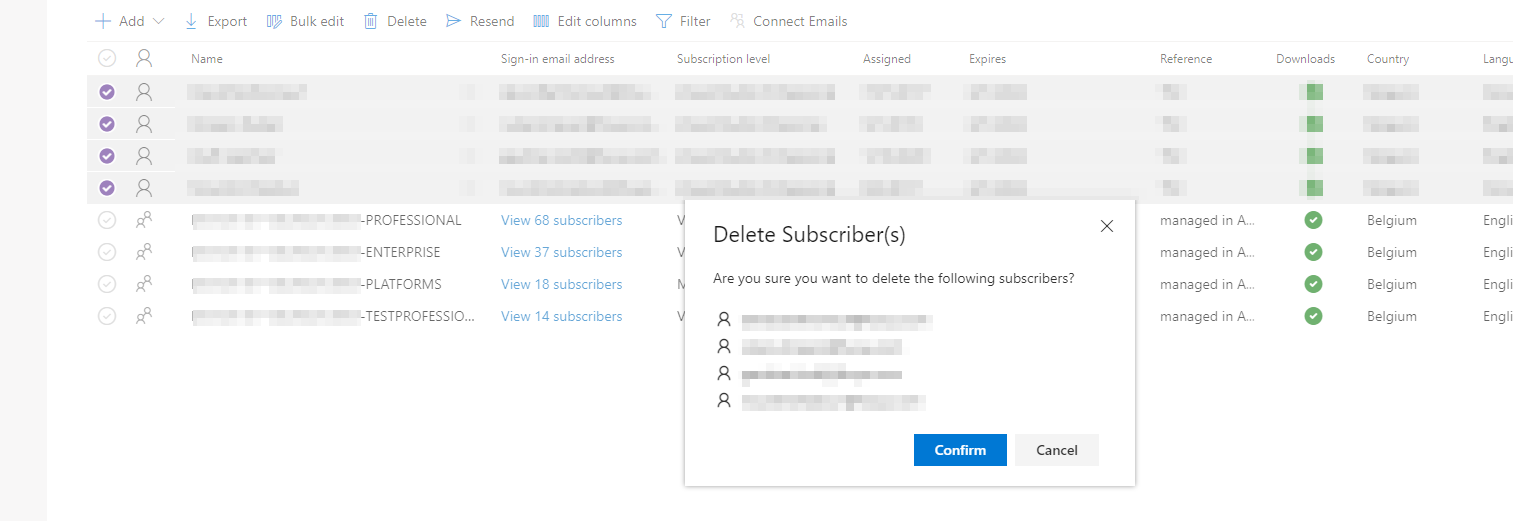
In my case, all I needed to do, was cleaning up the four that weren't imported:
And the final result is that you have a cleaned up (AD managed) visual studio management portal:

One of the added benefits is that you can hook this up in a people in/out process where the correct VS license is assigned automatically and where a cleanup is done for you when the user leaves the company and where the account is removed from AD.
Another benefit is that you can make a specific team manager of these ad groups and give them the ownership of the "license management", which allows you to put the responsibility in the most logical place!
Conclusion
This approach should help you to manage your visual studio licenses
- a lot easier
- with a lot less "pain"
- more transparent
This post isn't for everyone, but I really hope that it helps!
Tim